Official Luthiers Forum!
http://www-.luthiersforum.com/forum/

Installing Binding/Purfings (Pics)
http://www-.luthiersforum.com/forum/viewtopic.php?f=10102&t=14910
Page 1 of 1

Author:  Hesh [ Tue Dec 11, 2007 4:30 am ]
Post subject: 

This is the first part of a 2 thread tutorial that will provide "a method" for installing bindings and top purfings.  Of course there are as many ways to accomplish this task as there are guitar builders. 

No claim is being made that this is the "best" way - it's simply how I install bindings and purfings - for now.  My hope is that it will help someone who lacks a method or that any parts of this method may help anyone be more successful with this task.

As always I welcome a lively discussion and additional tips/methods from any and all members so that we all may learn something here.

Because of the great number of low resolution pictures I thought it prudent to divide this subject into 2 threads.

Additionally, although we are installing wood bindings and purfings today the very same method will work well for plastic as well so long as you use an appropriate glue.

Let's get started.

Below is an OLF SJ sized guitar that has already had it's binding channels routed, a Fox style bending machine that I use to bend the bindings and sometimes purfings, and one half of a mold that is used to tape the bent bindings and purfs in until they can be installed.


Today we are installing "Mahog-O-Lam" custom made wooden purfings from Uncle Bob at RC Tonewoods.  This is a Mahogany guitar so I thought that these purfings would look great.  I also saw them on a killer completed guitar that Brock exhibited at HGF.
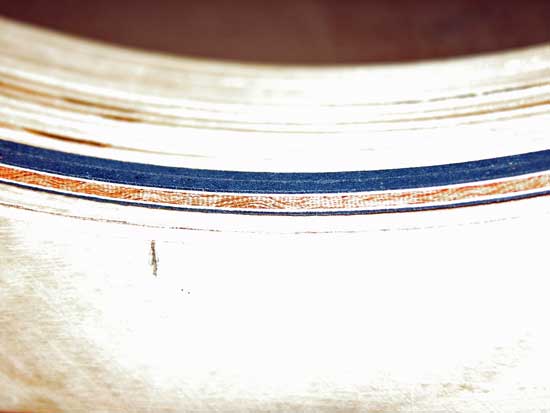


As you can see below the binding channels have already been cut using a Williams jig.  After I cut the channels I clean them up with a razor blade.  The top is then coated around the edges with Zinnser Seal Coat (shellac) which greatly reduces the possibility of tear out when removing the binding tape.

In addition once the top has a very light coat of Zinsser I go back with the razor blade and the remaining fuzzy fibers from cutting the binding channels are now much easier to nip off with the razor blade.
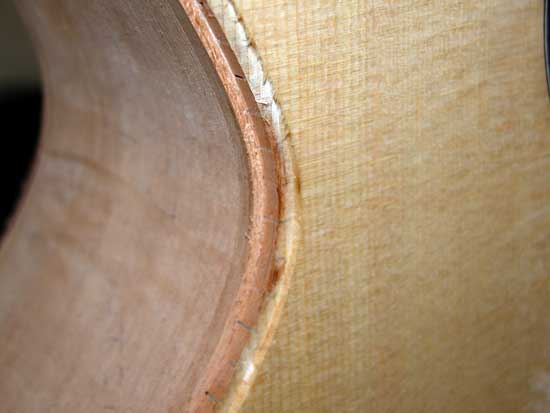


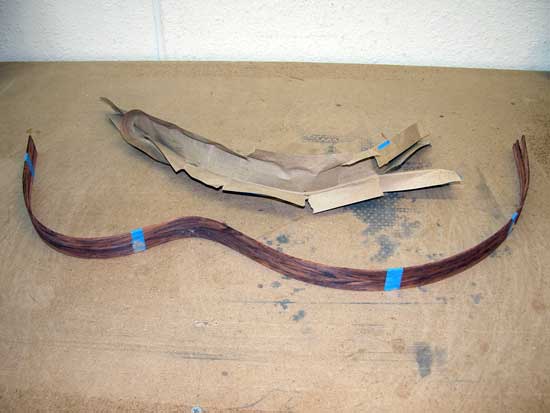
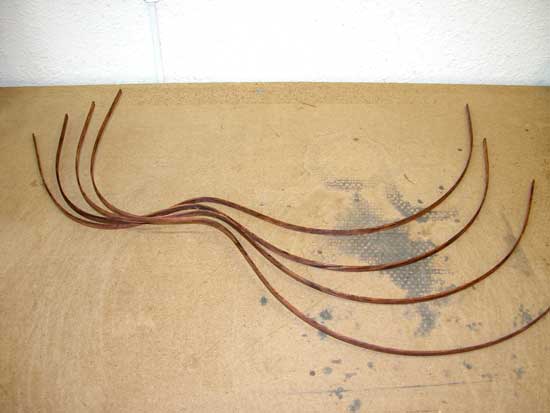
Here we see all 4 BRW bindings ( .090 thick) as they come out of the bender.  I use the very same method for bending binding that I use for bending sides and it works great for me.   That tutorial is in the archives.
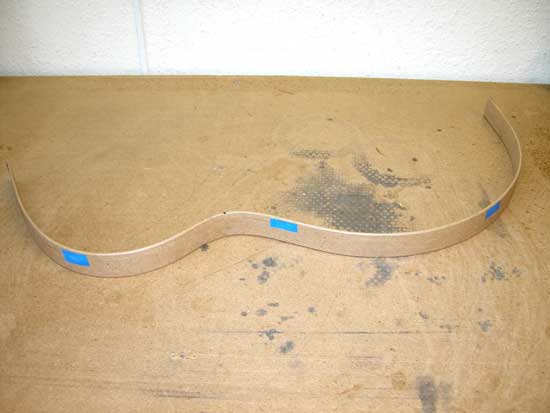


Once the bindings are untaped from each other I clean up the tape adhesive from the inside of the bindings with Naphtha.


Here is a shot of the bent BRW bindings.


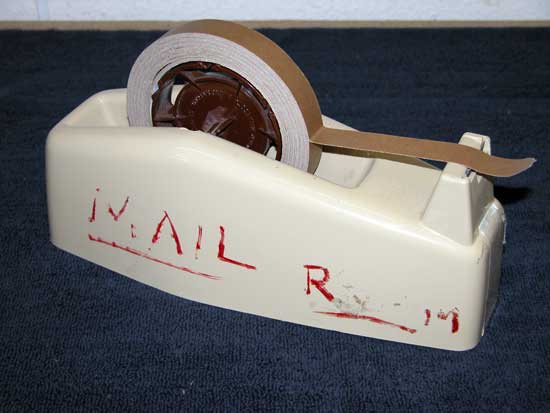
Something that will make binding much easier, at least it does for me, is a stolen corporate shipping and receiving tape dispenser......   Of course yours can be purchased from where ever you wish..... 

I have always used Stew-Mac's brown binding tape and it works very well for me.  Others get great results with fiber strapping tape and other tapes.  Again there are many ways to accomplish the same tasks in guitar building.


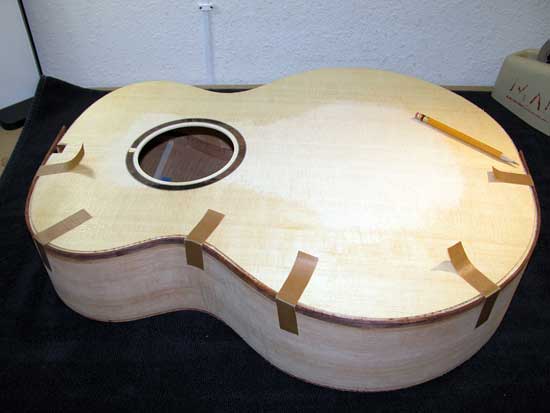
The first thing that I do when preparing to bind a guitar is to mark the exact center of the tail end of the guitar.  This mark will be what this process uses for fitting the bindings once the waist is fit first.


What is the very best way to fill a gap on a bound guitar?  Don't leave any gaps when binding it!

With this said I dry fit the waist area, the most problematic area for me, of the guitar first.  I manipulate the bent bindings and purfing for the best fit in the waist and then temporarily tape them in place.


Once the waist is well fit and the bindings or purfings are taped lightly in place I use the mark that we made in the center of the lower bout to mark where I will cut the bindings or purfings.


For the neck block area precision is not as important so I leave some over lap here that will be cut off later.  If this was the back of the guitar precision is very important here.


Once the purfings are cut and trial fitted to be sure that they fit well I repeat this process with the bindings.  Tape the bindings lightly in place, mark where the cuts will be made, and cut the bindings.


To cut bindings and purfings I use a "Zona" razor saw and mini-miter box.  I like the 42 tooth per inch Zona saw for this.


And now on to thread two  - Thanks for looking!


Author:  matt jacobs [ Tue Dec 11, 2007 5:09 am ]
Post subject: 

Great tutorial as usual. I can't wait for part deux! One tip, if you shellac the edges before you cut the binding/purf ledge it helps reduce "fuzzies".

Author:  Hesh [ Tue Dec 11, 2007 5:19 am ]
Post subject: 

Great tip Matt and it does indeed work.  This time I forgot to shellac prior to cutting the channels.......

Author:  Barry Daniels [ Tue Dec 11, 2007 6:29 am ]
Post subject: 

There is a lot of fuzzies on your spruce. What kind of a router bit are you using to cut the channels?

Author:  charliewood [ Tue Dec 11, 2007 6:32 am ]
Post subject: 

Awesome job Hesh - I love these things!
Looks like your gonna have another great axe there too...
Cheers
Charlie

Author:  Hesh [ Tue Dec 11, 2007 6:33 am ]
Post subject: 

Barry it is the Stew-Mac router bit set and I noticed that too.  It's getting tired I think and probably needs to be sharpened or replaced.  It's been used on 15 guitars with no attention other then cleaning it in Simple Green after each use.

Can these be sharpened?


Author:  Michael Dale Payne [ Tue Dec 11, 2007 6:43 am ]
Post subject: 

Seriously? You get that much fuzzing when cutting channels? Time for a new bit.

Just atteling your cage my friend

Author:  Hesh [ Tue Dec 11, 2007 6:45 am ]
Post subject: 


[QUOTE=MichaelP]Seriously? You get that much fuzzing when cutting channels? Time for a new bit.


Just atteling your cage my friend [/QUOTE]

Yeah - good point Michael - so is this going to be my Christmas present from you?

Author:  Michael Dale Payne [ Tue Dec 11, 2007 6:54 am ]
Post subject: 

That depends. I am still tallying up your naughty vs. nice ratio

Author:  Hesh [ Tue Dec 11, 2007 7:08 am ]
Post subject: 

- no router bit for me then.....

Author:  James Orr [ Tue Dec 11, 2007 7:52 am ]
Post subject: 

I'm not sure if Stew Mac sells bits you can have sharpened. I picked up a
few Amana bits so that I can take them in for sharpening when need be. I
believe that you can't use the William's jig with downcut spiral bits. I have
the Amana 47105 flush trim downshear bit, and it would work in the jig.
The downshear blade works to eliminate tear out by sloping the blade at
an angle rather than 90 degrees. The blade then slices down through the
wood.

Author:  Bill Greene [ Tue Dec 11, 2007 11:08 am ]
Post subject: 

Yes, you can sharpen the router bits from StewMac. Well, "I" can't do it, but I've seen it done, and it works fine. It was done by hand with a small, fine grit diamond blade, and a little oil. Cut like a charm after that.

Bill

Author:  Hesh [ Tue Dec 11, 2007 12:50 pm ]
Post subject: 

Thank Bill - I have been wanting to switch to the LMI set any way for two reasons.

First the Stew-mac set requires you to cut the purfs first since the bearing is high enough that it will fall into the binding channel if the binding channel is cut first..........

And second, the additional bearings negates the need for tape shims on the Stew-mac bearings.

And now the issue of it not being very sharp is an added incentive not to mention a seasonal case of TAS happening here.......


Author:  Bill Greene [ Tue Dec 11, 2007 12:52 pm ]
Post subject: 

[QUOTE=Hesh] And now the issue of it not being very sharp is an added incentive not to mention a seasonal case of TAS happening here.......
[/QUOTE]

The mind can rationalize anything where TAS is concerned.   

Author:  SniderMike [ Tue Dec 11, 2007 1:55 pm ]
Post subject: 

Nice, Hesh. How'd you bend the purfling?

Author:  Hesh [ Tue Dec 11, 2007 2:17 pm ]
Post subject: 

Mike I just bent it in the bender as always and misted it but did not wrap it in foil or craft paper.  It bends easier then binding and is pretty flexible on it's own.  For a .....dread sized guitar you might not even have to pre bend it.


Page 1 of 1 All times are UTC - 5 hours
Powered by phpBB® Forum Software © phpBB Group
http://www.phpbb.com/